

Watermark Photos Online
Our free watermark maker allows you to easily add text to photos, create custom watermarks, and protect your work online.

Watermark your photos to boost your brand recognition
Create banners for your social media

Create intro/outro images your Youtube videos or ads
Copyright and protect your content
Photo Watermark Maker Plans & Pricing
Upgrade to Photo Watermark Maker Pro to remove all limitations and get access to all Pro features.
How to Add a Watermark to Photos
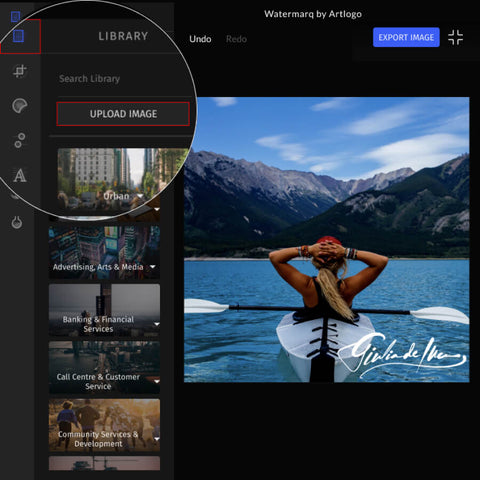
Add your photo or select from the royalty free stock photos library
Artlogo Watermarq contains a huge collection of royalty free backgrounds for Social Media banners, email footers and images for different purposes.
Every banner is filtered by professional designer and categorised for different tasks and domain.
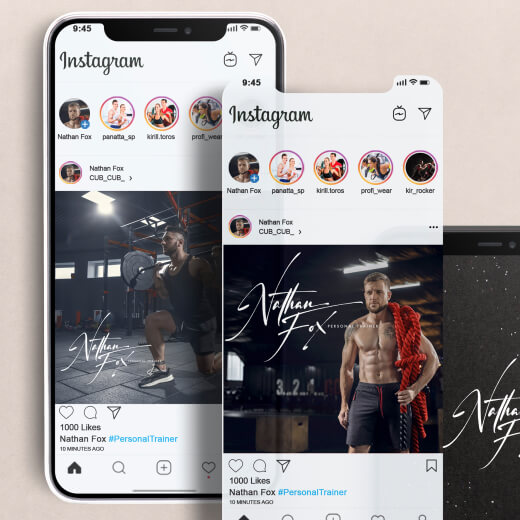
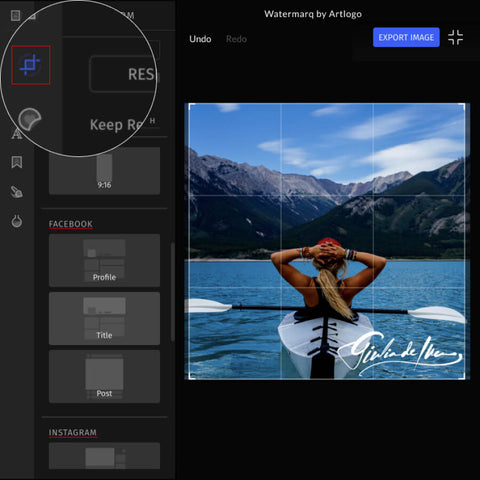
Crop and resize your photo for your Instagram / Facebook / Twitter
Our watermark app supports features such as cropping and resizing for Instagram posts (square and landscape), stories, Facebook profile, title, news feed post and other common resolutions.
Crop and resize your photo for your Instagram / Facebook / Twitter
Our watermark app supports features such as cropping and resizing for Instagram posts (square and landscape), stories, Facebook profile, title, news feed post and other common resolutions.
Add Text To Photo & Logo Watermark
After uploading your photo, add text to image or personalize it with your custom watermark. Add your name, or the name of your company, to your photo. Or upload your company logo as an image and add it to your photo.
With Artlogo’s watermark maker, you can quickly add text to photos and customize the look by adjusting size, transparency, and position.
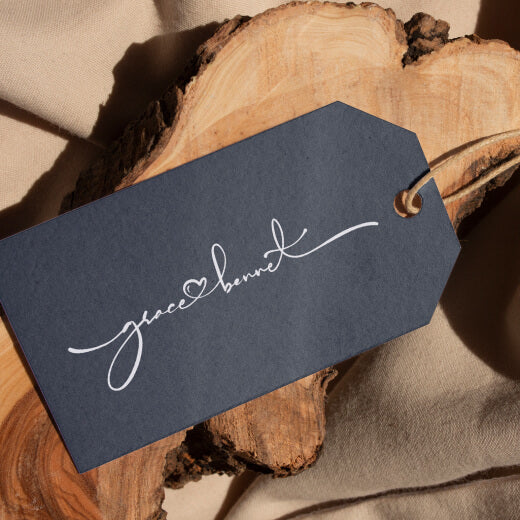
Artlogo Signature Watermark
You can easily add your Artlogo Signature as a watermark to your photos. For Artlogo customers their Logo Signatures will be automaticlly added to the watermark app from a customer’s account.
Learn more about how to create custom Artlogo Signature (click the link).
Artlogo Signature Watermark

You can easily add your Artlogo Signature as a watermark to your photos. For Artlogo customers their Logo Signatures will be automaticlly added to the watermark app from a customer’s account.
Learn more about how to create custom Artlogo Signature (click the link).
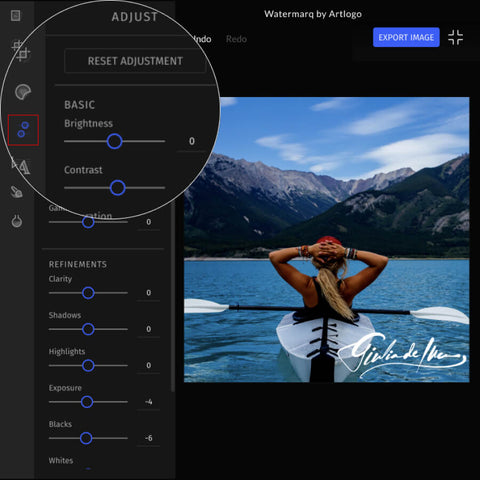
Adjust colors manually or with Filters, highlight elements with brush
To make photo more attractive, manually adjust the "brightness", "contrast", or "clarity" with the "shadows" and 10 other filters. You can also use thematic ready-made photo filters.
Adjust colors manually or with Filters, highlight elements with brush
To make photo more attractive, manually adjust the "brightness", "contrast", or "clarity" with the "shadows" and 10 other filters. You can also use thematic ready-made photo filters.
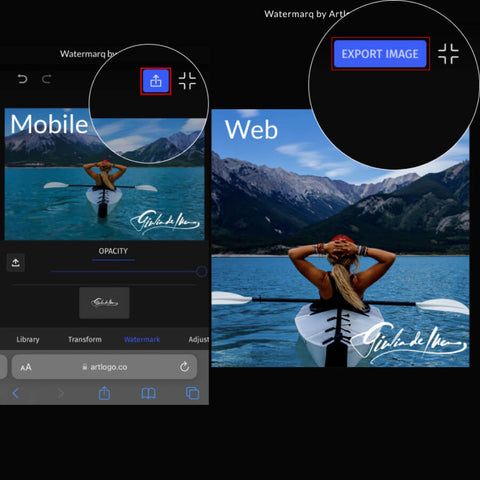
Save photo with watermark on iPhone and Android
The app works flawlessly everywhere: on desktop computers running Windows and Mac, as well as on iPhone and Android. User friendly simplified interface for a mobile.
Save photo with watermark on iPhone and Android
The app works flawlessly everywhere: on desktop computers running Windows and Mac, as well as on iPhone and Android. User friendly simplified interface for a mobile.
How to use Artlogo Photo Watermark Maker
Get a multipurpose signature logo to represent you
Fast Delivery
We value your time. Our delivery options start from just three days.
Created by professionals
Handmade by a team of professional calligraphers and artists.
Mobile & Computer Friendly
Your Artlogo will look amazing on any device.
Zero Risk: FREE Revisions
We want you to be happy. All of our logos come with 3 free revisions.
3000+ Reviews by our Clients
 Artlogo

Every person signs a large number of documents, send thousands of emails or active in social media during their lifetime. Artlogo's mission is to create your eye-catching signature that makes You and Your name unqiue and helps you stand out.
 GB
GB

Recently I purchased a logo with…
I recently purchased a logo with various add-ons from Artlogo, and I couldn’t be happier with the experience! The ordering process was smooth, and requesting revisions was simple. I only needed one minor adjustment, and the final result exceeded my expectations. I now use my logo everywhere—fantastic job!
FI
Very responsive
When I requested modifications to my original signature, Artlogo was highly responsive and delivered a design that perfectly matched my style. I've already started using it!
US
It enhances the quality of your presentation!
This is my second signature logo from Artlogo, and I use them to watermark my pictures before posting online. It adds a professional touch and increases the value of my work. I've received many compliments on how beautiful my signature looks!
US
Superior product & service!
I just ordered my second logo from Artlogo, and once again, they exceeded my expectations! Their dedication and attention to detail are truly outstanding. Not only do they have incredible design skills—working with you until you're completely satisfied—but they also provide a wide range of files for any use. I couldn’t ask for a better product or service!
GB
Excellent customer service
Excellent customer service with prompt responses and swift revisions. They designed a beautifully elegant signature, and I’m absolutely thrilled with the result!
US
I recently opened my own beauty studio
I recently opened my own beauty studio and wanted a logo that truly stands out. Artlogo created a stunning design for me! The first version wasn’t quite what I envisioned, but they made revisions completely free of charge. They even included a custom drawing that I absolutely loved. I highly recommend them!
ES
I am absolutely satisfied!
I am absolutely satisfied! The process was seamless, and the signature turned out exactly as I envisioned, with all my personal preferences carefully considered. I highly recommend Artlogo. Thank you again—looking forward to my next order!
AE
1st class
I was initially skeptical about ordering, but I decided to take the plunge—and I’m so glad I did! The communication throughout the process was excellent, and the signature they created was absolutely first-class. I was so impressed that I’m now planning to order several additional add-ons. The service has been outstanding, and I couldn’t be happier!
CH
Impressive!
In a time when great customer service and personal attention seem rare, Artlogo truly stands out! From the moment I started working with them, I was impressed by both their craftsmanship and dedication to customer satisfaction. They brought my signature logo to life, capturing my brand identity perfectly! Their quick responses and eagerness to assist with any questions were exceptional. If you’re considering Artlogo, don’t hesitate—you’ll be just as impressed as I was!
US
AMAZING HANDWRITTEN SIGNATURES!!!
Ordering online can sometimes be a challenge, but my experience with Artlogo has been nothing short of excellent. Sam and Tracy went above and beyond, making adjustments for me three times to ensure everything was perfect. Their quick responses to every email truly set them apart. I can't thank them enough—it’s one of the best companies I’ve ever worked with!
PR
The time and effort the Artlogo team...
The time and effort the Artlogo team put in to get a final product I was happy with is very impressive. At first I was embarrassed to suggest changes but was made to feel part of the process as we bounced ideas back and forth. I would recommend Artlogo for anyone looking for some branding or to make a signature for artworks or more. Very professional service with patient staff.
AE
I just have to take a moment to shout out a huge THANK YOU
I just have to take a moment to shout out a huge THANK YOU to the Artlogo team! I'm absolutely thrilled with the final result of my logo element! Even though I had a very specific request, they knocked it out of the park! This is my second project with them, and I can't recommend them enough! They're simply amazing!
BE
Their service and delivery and quality of work is excellent.
Their service and delivery and quality of work is excellent. I am truly satisfied by the customer support on my feedbacks, and they customized the final output as per my desired choice. At first I was little anxious regarding the delivery time, however, once I received the first draft, the waiting period was worthwhile.
SE
Super smooth process with great communication.
Super smooth process with great communication. Super happy with my designs. I am now using them on my Instagram photography page on all my photos. They look very professional and look great for taking my brand forward. Many thanks Artlogo! Super highly recommended.
DE
Artlogo made the process of creating a new logo very easy.
Artlogo made the process of creating a new logo very easy. They give you plenty of options for fonts. And once they have created your 1st draft, they are very amenable to suggestions. From start to finish, I received my new logo within a week.
GB
Creative, responsive, friendly and talented.
Creative, responsive, friendly and talented. The team work tirelessly to ensure they deliver the image you’re looking for. Set yourself up ~ high class service at an affordable price, without reservation, absolutely worth it!
AE
For years, I’ve wanted to formalize my signature...
For years, I’ve wanted to formalize my signature to use it professionally on the documents and materials I need. I couldn’t be happier with how it was designed—it exceeded my expectations. I highly recommend that everyone take this step; you won’t regret it. It’s a world of difference between using generic apps to create a signature and having one crafted by a real person. The quality is outstanding, and the customer service is equally impressive. This experience is not just about creating a signature; it’s about elevating your personal brand with the care and expertise it deserves.
What do our clients say about Artlogo


FAQs
-
A watermark is a subtle, transparent image or text that is overlaid onto another image or document to indicate ownership, authenticity, or copyright. It is typically a faint, translucent design that is embedded into the background of the original image, making it difficult to remove or alter without detection. Watermarks can be used to identify the content's creator or owner, deter copyright infringement, or add a unique identifier to a document or image. They can be created using various techniques, including digital editing software, and can be applied to a wide range of media, including photographs, videos, documents, and even audio files.
-
Using a watermark effectively protects your intellectual property and maintains ownership of your creative work. Here are some reasons why:
Prevents Unauthorized Use: A watermark makes it difficult for others to use your work without permission, as it leaves a visible signature that indicates ownership.
Deters Copyright Infringement: The presence of a watermark can deter potential infringers from using your work, as it makes it clear that the content is protected by copyright.
Provides Proof of Ownership: In the event of a dispute, a watermark can serve as proof of ownership and authenticity, making it easier to take legal action against infringers.
Enhances Credibility: A watermark can also add credibility to your work, as it indicates that you are serious about protecting your intellectual property and maintaining control over your creative output.
-
Watermarks can be categorized into different types based on their purpose, design, and application. Here are some of the most common types of watermarks:
- Text Watermarks: These are the most common type of watermark, which involves overlaying text or a logo onto an image or document to indicate ownership or copyright.
- Visible Watermarks: These are watermarks that are easily visible to the naked eye, often used for promotional purposes or to add a personal touch to an image.
- Invisible Watermarks: These are watermarks that are not easily visible, often used to protect intellectual property or to prevent unauthorized use.
- Digital Watermarks: These are watermarks that are embedded into digital files, such as images, videos, or audio files, to identify the creator or owner.
- Image Watermarks: These are watermarks that are created by overlaying an image onto another image, often used to add a unique identifier or to create a visual signature.
- Audio Watermarks: These are watermarks that are embedded into audio files, such as music or podcasts, to identify the creator or owner.
- Video Watermarks: These are watermarks that are embedded into video files, such as movies or TV shows, to identify the creator or owner.
- 3D Watermarks: These are watermarks that are created using 3D modeling software, often used to add a unique identifier or to create a visual signature for 3D models or animations.
Each type of watermark has its own unique characteristics and applications, and can be used to achieve specific goals, such as protecting intellectual property, promoting a brand, or adding a personal touch to an image.
-
Creating a custom watermark with a professional logo through Artlogo is easy and tailored to your specific needs. Here's how you can use Artlogo’s services to design a personalized custom watermark:
- Choose Your Style: Artlogo offers various logo styles, from handwritten signatures to sleek, modern logos. Select the style that fits your brand identity, ensuring that your custom watermark reflects your unique aesthetic as a photographer, artist, or business owner.
- Submit Your Design Ideas: Share your preferences, including the text (such as your name or company name) and any symbols or fonts you want to incorporate. Artlogo’s expert design team will craft a custom watermark logo based on your specifications.
- Receive Your Custom Logo: After finalizing the design, you’ll receive a high-resolution version of your custom watermark logo. This logo can be used as a watermark on your photos and images to enhance your brand identity.
- Use the Watermark Maker: Once you have your custom watermark logo, use Artlogo’s free watermark maker to easily add it to your photos. You can resize, adjust transparency, and position the custom watermark anywhere on your image, giving you complete creative control.
By using Artlogo’s services, you can create a custom watermark that not only protects your content but also enhances your professional image.
-
When it comes to the size of your watermark, it's important to strike a balance between visibility and subtlety. Your watermark should be large enough to be visible but not so large that it detracts from the main subject of your photo.
A good rule of thumb is to aim for a watermark that covers around 5-10% of your picture. This will ensure that it is visible without being overly distracting. Additionally, you'll want to make sure that your watermark is positioned in a way that doesn't obstruct important elements of your photo.
When it comes to the specific dimensions of your watermark, this will depend on the size of your photos and the resolution at which they are viewed. As a general guideline, aim for a watermark that is at least 1000 pixels wide on the longest side. This will ensure that it remains visible even when your photos are viewed at larger sizes or higher resolutions.
-
Follow these simple steps:
Step 1: Choose a photo editing software that supports watermarking like Artlogo.
Step 2: On your computer open the software and import the photo you want to watermark.
Step 3: Create your watermark using the software's text or image tool. Be sure to choose a font, color, and size that is clear and legible but not too distracting from the image itself.
Step 4: Adjust the position and opacity of the watermark to your liking.
Step 5: Save the watermarked image in the desired format as discussed earlier.
-
Watermarking your photos on an Android phone is quick and easy. Follow these steps to get started:
Step 1: Step 1: Open online Artlogo Watermark app (you don't need to download and install any software)
Step 2: Open the app and select the photo you want to watermark.
Step 3: Choose whether you want to use text or an image as your watermark.
Step 4: Customize your watermark by selecting the font, color, size, and opacity.
Step 5: Adjust the position of the watermark on your photo.
Step 6: Save the watermarked image in the desired format as discussed earlier.
With these tips, you can easily protect your photos and ensure that they are credited to you wherever they are shared.
-
If you are an iPhone user, follow these steps to add a watermark to your photos:
Step 1: Step 1: Open online Artlogo Watermark app (you don't need to download and install any software)
Step 2: Select the photo you want to watermark.
Step 3: Choose whether you want to use text or an image as your watermark.
Step 4: Customize your watermark by selecting the font, color, size, and opacity.
Step 5: Adjust the position of the watermark on your photo.
Step 6: Save the watermarked image in the desired format as discussed earlier.
-
Even if someone uses your watermark without your consent, it may still be considered a copyright violation. However, if someone violates your work and you have registered your copyright with the U.S. Copyright Office, you might be entitled to some compensation. You can also demand that the person or business using your watermark stop doing so right now by sending them a cease and desist letter. Legal action might be required in some circumstances to safeguard your intellectual property. It is therefore best to take the required actions to safeguard your work before any violation takes place.
-
Making a signature watermark at Artlogo is an easy and uncomplicated process. The platform gives users a variety of personalization options, including font, size, color, style, and spacing. Users can also add icons or symbols to their watermarks to completely personalize them.
Artlogo stands out for its unique approach to distinctive design. Users have the option of having their signature penned by a skilled calligrapher by hand, providing a unique personal touch that cannot be achieved by digital methods. For individuals who want a truly distinctive signature watermark that represents their business and personality, this option is extremely helpful.
At Artlogo, the custom design process begins with the submission of information and/or sample signatures. The calligraphy, designer, and brand consultant teams then proceed to work on developing the ideal signature watermark for the client. When an idea is complete, the best artists get to work on it, making sure that every Artlogo Signature is entirely handwritten and one of a kind.
Bloggers and creators can improve their branding efforts and distinguish out from the competition by using Artlogo. A professional and distinctive signature watermark can help bloggers stand out from other authors in their industry and gain readers' confidence. Users may be confident that their custom watermark will be just what they need to advance their blogging with Artlogo's quick turnaround and free changes.
Sources:
- https://www.pixsy.com/academy/image-owner/protect-images-online/
- https://manuscriptevidence.org/wpme/watermarks-and-the-history-of-paper/
- https://www.legalzoom.com/articles/how-do-i-use-the-copyright-symbol
- https://libraries.mit.edu/news/dandy-roll-papermaking/15297/
- https://www.calligraphy-skills.com/what-is-calligraphy.html
- https://guides.lib.umich.edu/c.php?g=282942&p=1885350
- https://www.dme.us.com/2018/12/11/what-is-dpi-and-what-are-the-requirements-for-different-industries/
- https://www.template.net/graphic-design/watermark-sizes/